Monday, January 30, 2012

DIY Wall Panels

A few weekends ago my roommate and I FINALLY decided to paint an accent wall in our living room after talking about it for...oh about 7 years or so.

What finally prompted our motivation after so long was inheriting a dark green sofa set from my sister back in November. Because our living room decor previously consisted of red curtains, the addition of the green couches was a bit too holly jolly for us. Luckily the combo worked perfectly with our Christmas decor, giving us some time to come up with and agree on a new color combo.

We decided to go with a neutral color palette against the green with subtle pops of orange. The first thing to go were definitely the red curtains. The panels we chose were a rustic burlap style from Target (LOVE them). Once the curtains were chosen the rest of the room just fell into place. Overall the redesign of the living room was very inexpensive. New curtains, throw pillows, a can of paint...and the room was transformed!

Custom wall Panels
A few years back I painted floral wall panels for one of the walls, pulling in all of the colors we were using in the living room. Although I still liked the painting, it no longer went with the room.

Being perpetually on a budget and a committed DIY girl, I knew I was going to make something myself. I tossed around a few ideas and actually had settled on a plan when I passed by these tin tiles at Michaels in the exact burnt orange and brown that we were using in the room. Believe it or not, the tiles were only $1.50! I may have to go back and buy the rest of them. I visualize so many uses for them, and they were so inexpensive! These specific tiles were found in the $1 bin at Michaels, which changes often so you may not be able to find them at your local store, but any lightweight tile or square accent would work. I am merely showing you an idea of something you COULD do rather inexpensively for your home.
                            
Supplies:
6 Blank canvas squares
Acrylic Paint (I used pearl white and sand)
Stencil of your choice
Tin tiles
Foam blocks
Paint brush
Hot glue gun


The process was really very simple.

First, I painted all of the canvas squares in a neutral color (a few shades lighter than the painted wall I planned to hang them on). I lined up the canvas squares the way they were going to hang on the wall so that stencil lined up correctly. I suggest labeling the back of your panels so you know the order they go in. I did not do this, and it was a pain in the ass when I went to hang them because the stencil was so light. Keeping the canvas in place, I painted the stencil in pearl white acrylic paint in a straight pattern. This was the only tedious part of the project, but the part that I feel was the most worth the time. The iridescent paint is so subtle and elegant against the wall.

I always use painters tape when I am painting with a stencil because the slightest shift will screw it all up. You may have to replace the tape every 4 or 5 applications. Be sure to wipe your stencil with a wet rag every other time so the paint doesn't start to spread onto unwanted spots when you are placing the stencil down on the canvas.


 I used foam blocks to raise the tiles slightly off of the canvas by gluing them down using a hot glue gun. Foam glued to the canvas, tiles glued to the foam. 


Alright now I have inspired myself to go back to Michaels to buy more tiles! 
You never know when you may need a decorative tile laying around...am I right girls! :-)

Monday, January 16, 2012

Happy 2012!

Now that the dust has officially settled from my "first" holiday season online, I am able to update everyone on what I have been doing, and more importantly what I have been making.

Anyone who follows this blog or my facebook page knows that I do not try to present myself as a seasoned jewelry designer who knows all of the tricks of the trade. I am learning, trying new things and making mistakes all of the time. I have no problem admitting to my newbie status. We all have to start somewhere. Why not invite everyone to follow along. Maybe you will learn from my mistakes...maybe you will appreciate my designs knowing the road traveled...maybe you will be kind enough to lend some of your own advice...maybe you have been supporting me from the very first pair of earrings and are excited to see where I go with this. So, although you have not heard much from me these past few months, I have been working very hard and learning so much throughout this past holiday season and I am ready to finally share it with you.

Wasn't it just October?!?
This was also my first official holiday season offering my photo necklaces and ornaments in my Etsy shop. I was excited and hopeful, but also a little nervous. Luckily I was able to keep up, and next year I will be much more prepared. I knew going into November and December that I was just to do the best I could but that I was probably going to make some mistakes along the way. I just put my head down, got it all done and took notes along the way. The plan for January is to implement what I have learned and get myself organized. You will see a few changes this month. I will be expanding the options of photo jewelry available to you within these next few weeks. So stay tuned and get your pictures ready!! There will be a contest coming your way where you can win a personalized photo necklace at 1/2 the price!

Take a look at a few of the orders I competed for Christmas, and what some of my wonderful clients had to say about their necklaces. Unfortunately sometimes getting the order to the post office on time took precedence over taking pictures of the final outcome. Note: always make time to take pictures!

Personalized Photo Ornaments!!


I was pleasantly surprised with how many orders I received and how excited people were to give their family and friends something that I had made! I was able to work with some really wonderful people. Everyone was so friendly and helpful. Thank you, to everyone who chose to give one of my handmade necklaces as gift this year!

Monday, October 17, 2011

Old printer tray = Jewelry organizer!

Several months ago I came across an Etsy shop that was selling old printer trays re-purposed as jewelry organizers and displays. I thought this idea was genius! I needed a new way to separate my personal stash of jewelry from the items I planned to sell, and this would work perfectly with the semi-vintage/rustic style of my room.

Although the printer trays in this shop are beautiful, all I see when I look at them is how can I make one myself. I also alerted my friend and fellow jewelry designer, Amy over at Helen Ethel Studio about this discovery because I knew she would flip over the idea as well. We decided to start hunting for trays, but neither of us were in a big rush. It's good to be patient when looking for something like this, you never know when you will find it. My Stepmom has been searching for certain vintage items for years!

Luckily it only took me a few months to find my printer tray!

A few weekends ago I decided to take another trip up to Shupp's Grove in Adamstown with one of my oldest and dearest friends, Lauren along with her adorable son Luke. Luke made quite the impression amongst the market goers in his little overalls.
We did hit some of the other markets that day, but it was at Shupp's that I found a stash of printer trays for so cheap!! I think the most expensive one was $20,  
I bought mine for $7!!

I came home and immediately took a picture to send to Amy. She then told me that SHE actually found 2 trays the day before! Turns out Amy and I found our printer trays at the same market, under the same little tent, on the same weekend in a town that isn't right up the road for either of us. I find this so amusing. After months of talking about them we found them on the same weekend without even knowing the other was going there!

I got started as soon as I could. All it took was a little bit of stain and some hooks. I had to trim the hooks so they didn't push through to the other side. That made my arms hurt! But well worth it!

I can't wait to see what Amy does with her trays!!


I am giving full credit to the shop owner who ignited this idea. I thought about posting the link to her shop, but I don't want to offend her by pointing out how I made one myself. Which is also why I am not going into detail about how I made my printer tray (email me if you have questions). So go on over to Etsy and search printer trays. Her shop is awesome!
However, I am always working on a budget, and I am a DIY girl. When I see something I like, I don't want to buy it, I want to figure out how I can make it...I blame/thank my father for this. So if you like this idea too, but don't want to take the time to make one yourself, visit Etsy!!

Monday, August 29, 2011

Polymer Clay Cuffs

This post has come because I feel the need to proclaim my new found love for polymer clay. I have been steadily working with the material for almost 2 years now, but I went thru a period where I was lacking some motivation and creativity when it came to coming up with new stuff...until recently.

I can't to stop making cuffs. I love them! There are so many possibilities when you are working with clay. I can mix pretty much any color I can imagine, use many different stamps in many different ways and then accent the design with any paint color I chose. If I mess up, I just roll up the clay and start over.

There is nothing like rediscovering a favorite material and becoming inspired by it all over again. The kind of inspiration that makes you feel like you have just stumbled upon something new that kick starts your creativity triggering a marathon of new projects. A domino effect that all crafters, artists and designers understand.

You might be familiar with a material and think you know all that you need to know about it, but sometimes there is a moment when you are introduced to it an a whole new way. Maybe you accidentally mixed the wrong color...or haphazardly sliced your clay in an unintended angle, or prematurely pressed down on an imprint leaving the design off center...What do you do when this happens? Roll up the clay and start all over? Sometimes, but most of the time I just go with it because I have learned by now that these are the moments that often produce my favorite pieces.

This green floral cuff was a "happy accident". I have had this large flower stamp for awhile, I just never really looked at it until the other night. I was actually trying to work on something other than a cuff, and I was only experimenting with the stamp in some spare green clay I had sitting on my work station.

I'm pretty sure this might be one of my favorite cuffs so far. Everyone I have shown it too seems to be just as enamored with it as I am. Too bad I sold it last night. I will make another one...or eight!


How I make my cuffs...

First you have to condition the clay. I have come to realize that I must be patient with this step. Sometimes I am too excited about my idea and I do not work the clay long enough, but it really is worth the time. Run it through a pasta machine (designated only for polymer clay), roll it and work it with your hands, turn on a bad 80's movie or anything that stars Schwarzenegger and hand it to the man hanging around. He'll be so zoned out watching the movie that he won't realize how long he has been working the clay.
What..? My hands hurt after awhile...his are bigger and stronger!
He has mixed some pretty bad ass colors for me...Thank you, Jeff!

After the clay has been sufficiently conditioned I run it thru the pasta machine again. Then I use a rolling pin to gently smooth any lines the pasta machine has made. I will trim my piece a bit at this time, but not down to the exact size that my finished cuff will be because when I press down with the stamps it will distort the edges and you will have to trim again.

Then stamp it up, bake it and paint it.

What? Did you think I was giving away all of my secrets? :-) Leave a comment if you have any questions about my process.

Here are some more of my favorite cuffs...
If you want to see more, visit my Etsy shop and my facebook page.


Monday, August 22, 2011

Welcome Baby Patrick!

This past weekend my family welcomed my Sister's second child and first boy, Patrick Edward. A nice strong Irish name for a beautiful baby boy.

When my Sister had her first child, I made a slideshow of the pictures taken during Elizabeth's first few days to share with family members who live far away, so of course I made another one for Baby Patrick.


I chose "Circle of Life" by Elton John mainly because of the theme my Sister chose for Patrick's nursery. She went with an adorable Lion King crib set from Babies "R" Us. If you are wondering how I made this video, I used Microsoft Live Movie Maker. It is actually a pretty easy program to use if you are just a little patient with yourself. If you take the time to use all of the features they offer, your video will turn out really well.

I also felt that the song was a good choice because of what my family has gone through these past few months. Edward is our Grandfather's name who recently passed away this April. My Grandfather was a wonderful man and although he had many children (8), many grandchildren (14) and now 4 great grandchildren...he loved each and every one of us just the same, and made us all feel just as important as the first. Unfortunately my new nephew is the first member of our large family that my Grandfather will not meet, so it is very fitting that he carry his name with him. I am certain my Grandfather is watching over Patrick and the rest of the family that he and my Grandmother so lovingly created during their 58 years of marriage.

Aunt Ryann likes to paint...
In preparation for both of my Sister's children I offered to make paintings for their nurseries. I struggled a bit with Patrick's painting because I wasn't too sure about trying to paint a Simba...so I went with other parts of the nursery set.


Once I got started it all seemed to work and flow together. The spots above are from the crib sheet and the rest mimics the crib blanket. I just wanted to incorporate all of the colors to pull the room together.

I really enjoy painting. It is very relaxing and helped pass the time while I was eagerly awaiting Patrick's arrival.

I am so happy to welcome Baby Patrick into our family. I have loved watching Elizabeth learn and grow over these past (almost) 2 years, and now we are able to share in the life and growth of two new family members!!

Elizabeth is a little skeptical of Patrick right now, but little does she know that Mommy and Daddy have given her a friend for life. I don't know where I would be without my Brother and Sister.

Saturday, July 23, 2011

Etsy Treasury

The other day I received a notification on Etsy that one of my cuffs had been added to a "treasury" list made by Get Crafty on Etsy. Although I was honored that any of my items have been added to any list, I didn't exactly know what this meant. Etsy has a lot going on and I admit that I am only beginning to really understand all that this online market place has to offer. I quickly realized that "treasuries" were galleries comprised by fellow Etsians based on a theme. This immediately became my preferred method of searching for random delight-fulness on Etsy. Whenever I am on Etsy I stumble upon something fantastic that I wasn't even remotely looking for, so searching the treasury list is an even more effective way to randomly discover something fantastic and unique.

So I decided to take a crack at my own treasury list today. I am glad that they only give you 16 slots, otherwise I would have been adding items all day!! I chose to make 2 treasuries; One called, Sweet Baby Girl- Pretty in anything but pink and Little Man. I chose these 2 themes in honor of all of the new babies that have come into the world recently, and for some that I am eagerly awaiting the arrival of. I had so much fun making these treasuries and while searching I came up with many more ideas for future treasury lists.

I loved some of the items so much that I wanted to share them here on my blog. For the complete list visit my treasury.

Treasury # 1 Sweet Baby Girl- Pretty in anything but pink
I'm not saying there is anything wrong with pink, but I wanted to make a list that excluded the normal "girly" shades of pinks, purples and reds for those ladies that know you can feel just as pretty in a neutral color palette. So I chose shades of green, brown and ivory. I loved some of the items so much that I wanted to share them here on my blog.

0 to 3 Months Baby Bootie Boots, crocheted, dusty green by Handmade Baby Love


Ava. Baby Shoes by Ivory and Moss on Etsy

Austria Maria Dress by MilliLee Designs on Etsy


Treasury # 2 Little Man
My sister is having her second baby (a boy) in less than a month!! In order to contain my excitement and not drive my sister crazy, I decided to peruse some items for the "little man". I absolutely love the hats they are making for little boys now!

Dark Grey Loafer Baby Booties by Tilly Whistle on Etsy

You have to check out the rest of Tilly Whistle on Etsy...All of the shoes are ADORABLE!!

Brown Eyed Boy Brimmed Beanie Newsboy Hat by Sunset Crochet and Quilt on Etsy


Matching Baby and Parent Army Style Hats by Owl and Dot Dot on Etsy


I had so much fun making these treasuries, and while searching I came up with many more ideas for future treasury lists. I will be sure to post them when I do.

Monday, May 16, 2011

My Rooftop Vegetable Garden

One of the first posts I ever wrote for this blog was about my little rooftop veggie garden last year. Well it is that time of year again, and I was very excited to give my rooftop garden another go. I'm still limited by my location, but I am not feeling as clueless about planting vegetables and herbs as I was last year.
I love the excitement of starting out with a brand new garden and all of the hope that my little edibles will thrive and produce this summer.

Recap of last year...
My little container garden started out pretty strong the first month. Every time I went out on the roof I noticed something new had sprouted. Sometimes I only saw a new leaf or two but I knew I was generating growth, and that was an accomplishment. The jalapeno peppers and cherry tomatoes started out the strongest, followed by the cowhorn peppers and bell peppers. The herbs did well all season. Herbs are pretty easy as long as you harvest them regularly.

The downfall of my rooftop garden came after we were hit my a huge summer thunderstorm. One of those short, yet powerful storms that do a lot of damage in just a few minutes. Many homes were out of electricity for a few days. I was at work at the time of the storm, so when I came home I went straight out to the roof to assess the damage. Any plant that had any height to it was uprooted and saturated with water. I did the best I could to revive them, but I never saw another pepper or tomato the rest of the summer. The cherry tomatoes did come back for a short time, but shortly met their demise after some intense heat. I admittedly lost my enthusiasm after I lost the majority of my crops and didn't pay as much attention to the cherry tomatoes as I should have.

Second season brings a little more experience...
As with anything you do, there is always room for improvement the second time around. This year I made a few changes, corrected a few problems and added a few more crops.

Last year I made a couple of mistakes, and this year I made a few changes...
  • The main and most embarrassing mistake being the lack of drainage holes in my 2 large galvanized tubs. I have been planting flowers long enough to know that you need proper drainage so your roots don't drown. This is even more important when growing vegetables. DUH!! I don't know what I was thinking. I probably meant to and just dumped in the dirt out of eagerness and excitement, forgetting about the holes. I am admitting this obvious FAIL so anyone reading this remembers to be patient and double check your containers. I had to laugh once I realized what I had done. Also explains why my peppers never recovered after the storm!! Luckily the Boyfriend was around on gardening day to help me pound holes into the tubs this year.

  • A change I have made this year is to plant a bit more in each pot. I'm sure well experienced gardeners and rule followers would advise against this because of those little tags that come with each crop telling you to plant everything miles apart from one another. That's crap. I've been following those tags for years and all of my flower pots and baskets always turn out so sparse and lame. Plus, when you go to the garden centers or read the magazines you'll see way more in their containers than those little tags tell you you're permitted to plant. So screw it. I'm not saying I'm going to plant 10 seedlings per pot, but I am going to push the limit a bit more this year.
  • Much of my research last year told me that planting a vegetable container garden was limited to tomatoes, herbs and a few other vegetables. I don't like tomatoes very much, but I still planted 3 different types last year because I wanted to plant SOMETHING! After doing a lot more research and gaining a little bit of confidence from already having one season under my belt, I realized that I really can plant anything in a container, they are just going to be smaller and require a bit more patience and attention. So I added a few more things this year. There are so many more edible treats that I would like to try, but I had to stop somewhere. For now...I do have a big enough roof to keep expanding...
  • Planting on a slanted roof wasn't really a problem except for the rolling of fallen peppers and tomatoes, which did not please my landlord very much. This year I planted my tomatoes in the back followed by the other flight risks and the herbs went in the front because they will not leap out of their container. I had left over flowers after I finished stuffing my hanging baskets and porch pots so I planted them in 2 window boxes to act as an additional barrier. If anything falls, hopefully they will be blocked by the pots in front. If that is still not enough I am going to add chicken wire to the front pots.
  • Last year I layered the bottom of my pots with foam peanuts. They seemed to work fine until the end of the season when they rose to the top of my poorly draining pots and went flying. Again, not pleasing my landlord very much. Plus they were expensive! I needed another method for layering my pots this year. Pebbles and broken pots are often recommended, but I am fearful of overly heavy pots on the roof so I don't think they are a good idea. This year I read online about gardeners using crushed up water bottles. They seemed to be a perfectly inexpensive, weightless solution that I was happy to discover. We shall see how they work.

What did I plant this year?


Peppers
  • I planted a lot more hot peppers this year - I love cooking with them, and I'd like to someday grow one hot enough to hear my Dad actually admit that a pepper is hot. 
The butterflies indicate the 2011 additions to my rooftop garden.


Veggies
  • Crookneck Squash
  • Zucchini
  • Pickling Cucumbers - Hoping to make my own pickles using the dill seeds from my dill plant


 Herbs 
  • I planted most of the same herbs as last year with the addition of Lemon Thyme. 
  • The Cilantro makes me a little nervous because it is such a pungent and plentiful herb. I am concerned that they are going to take over.
  • I omitted rosemary this year because I hate rosemary. I planted it last year for my roommate, but she didn't get much use out of it either.
 
I have a few simple goals this year...
  • Yield enough vegetables to make a meal primarily from my garden!
  • Make pickles!!
The point to my ramblings about my tiny little rooftop garden is to hopefully inspire more "urban gardeners". Just because you have a tiny outdoor space or think you have very little to no green thumb, you can still get out there and see what you can grow. Clearly I do not know very much about growing an edible container garden, but I am learning and that is part of the fun. I don't think I would be nearly as intrigued if I knew all of the secrets and was certain I would have a bountiful harvest. Right now just a tiny little jalapeno bud (spotted this morning) is something I can be proud of!

Monday, April 25, 2011

Chocolate Chip Cookie Trifle

For Easter this year I made a new trifle that I have not made or even tasted previously. If you have read my recipes before, you already know that I try to make what I know my Grandmom will like. She definitely has a sweet tooth and will enjoy most desserts, but anything incorporating chocolate is always sure to please her.

Usually I make something lighter or fruity for Easter, but my Grandmom has been going through a very tough time after the loss of my Grandpop earlier this month. So if I can make something that will give her some enjoyment even for 5 minutes, I am going to try my best to do so, and this means chocolate.

I had other things to cook/bake the day before so I needed something easy. I have to admit that this recipe needs to be played with a bit. Everyone seemed to enjoy it and the trifle dish was empty, but I think that the combination has the potential to be awesome, and I think I am just not quite there yet. I am posting the recipe because I am totally open to suggestions, and I think it will be interesting to see how it develops.

Chocolate Chip Cookie Trifle
Probably the easiest trifle I've made so far. 
                                        
Ingredients:
  • Chocolate chip cookies - I cheated and used store bought cookie dough. I will probably make them from scratch next time because I think this will cut down on the richness. 
  • Brownie mix - Follow the "cakelike" instructions on the back of the box. 
  • White chocolate pudding mix
  • Homemade whipped cream

Bake the cookies until they are done but still a little soft. You do not want them to be too hard or crunchy. I didn't pay any attention to the shape or size when I loaded them up on the cookie sheets. I knew I was breaking them up anyway so it didn't matter what they looked like. I set aside a little bit of the dough to make small round cookies to decorate the top.
Bake brownies- set aside to cool.
Make the pudding so it has time to set in the fridge.

Layers: 
  • Layer the bottom of the trifle dish with half of the brownies.
  • Top with half of the pudding.
  • Break up the cookies and cover the pudding then top with half of the whipped cream.
  • Repeat the layers finishing with a layer of whipped cream. 


Top of the Trifle:
You can do whatever you want on the top. You can see in the picture what I did. Have fun with it! My boyfriend topped the trifle with the final layer of whipped cream, I pushed in the cookies in a star/flower pattern, he spiraled the chocolate syrup on top, and then we finished it with the cookie crumbs. He wanted to add oreos too, but I told him that was a whole other trifle.

Last night while I was trying to sleep I had trifle combinations flying in and out of my head, and I came up with one that I am really excited to try. You know those TastyKake candy cakes with the peanut butter and chocolate? I'm not going to actually use them, but I am going to base the trifle off of that flavor combination. I might have to go ahead and make this for no reason because I am excited to see how it will turn out.


Thursday, March 17, 2011

Jewelry Parties

Since the festival season is on hiatus during the winter, I began hosting home based jewelry parties. I needed a way to keep the momentum building after all of the positive responses I gained over the summer. Plus I had no intention of slowing down in the studio, so I had to do something with my inventory before I had necklaces hanging from every corner of my home.

The first party was at my Sister's home in December. I felt very comfortable with having my first party at her house because it allowed me a chance to test it out and see how different a  house party was from a festival. My Sister is very encouraging and supportive so I knew this was a safe place to get my feet wet. She invited some of her friends and coworkers, provided tasty snacks and beverages for everyone to enjoy while they perused my designs and caught up with one another. The afternoon turned out very well. I enjoyed being able to interact with everyone in the more intimate setting of a home that a street festival seldom allows.

Having a jewelry show in a home also allows your guests to really think about their purchases and try things on without feeling rushed by crowds coming through. Plus you know they are coming to buy. Which was a little bit awkward for me at first because I felt reluctant about "forcing" myself onto everyone. Then I thought about another benefit of the facebook business page - I upload pictures whenever I create new jewelry, so they have seen my work and they already know they like my jewelry or else they wouldn't be coming to the party.

I've had 2 more parties since then. One at my Sister's friend's house in York, Pa. One at my house with my friends and coworkers, and this Saturday we are having another one for my roommate's friends.
I really enjoy having them in my own home because it allows me plenty of time to set up, and I can work the jewelry into the decor of my home. For example; I picked up 2 large old wood frames for $5 each, painted them, backed them with screens and inserted S hooks for the necklaces and earrings to hang from. I then placed them on my walls in place of our regular wall decor so they worked right into the room like they had always been there.

As with the festivals, I learn something new every time I host a house party and some of the rules are different than they are when attending a festival.
  • When setting up for a house party I consider the fact that this is a more intimate event. They already know who I am and why they are there so I try not to overdue it with the marketing. I leave my business cards on the table and my earring cards are marked with my information, but I do not hang up my banner or plaster my information all over the house. I just feel that this is tacky. This is just my personal opinion, you may feel otherwise. 
  • I also decided after the first 2 parties that I wasn't going to place price tags on everything. I may revisit this decision later on, but here is why I have decided that this may be a good idea; Hanging tags from everything disrupts the flow of my display. I don't really like them - although I know they are absolutely necessary when dealing with a festival crowd. Removing them from the home shows allows me to interact more with everyone. I make it known somewhere on an 8x10 framed sign that everything is under a certain price so my guests aren't apprehensive about asking and being shocked.
  • I made invitations that I can send in an email, facebook or snail mail. I had to design them for the first party, then I decided to order some off of vistaprint for the future. I put my contact information and a few pictures of my designs on the front and left it mostly open on the back for the information to be written in. That way I don't have to create new invitations every time someone offers to host a party for me. 
  • Be prepared to take orders. Mark them down with as many details as possible. I say this because I made an error with one of the orders I received at my Sister's party. I mistakenly marked down the wrong color of clay (the difference between a matte gray and a shiny gray). I made the piece sent it along and received an email telling me that this was not the color she originally ordered. I was embarrassed by this mistake and quickly made her what she had asked for and sent it along. Had I been more specific when I wrote the order down I would not have made this mistake. Lesson learned!!
  • Always provide the hostess with a gift. I base this on how many people attended and my sales.
I have really enjoyed the jewelry parties, and I look forward to doing more of them throughout the winter. But right now I am getting super pumped about the return of the festival season and I have BIG plans for my booth this year. To think the thought of being a street vendor last year made me so nauseous. Now I can't wait!! I will see you out there!!

Thursday, February 3, 2011

Screw Jared's. He went to Michaels!

Gift giving can already be a pretty difficult task. Add into the mix that your girlfriend designs jewelry and that automatically scratches one of the go to ideas off the list. Don't get me wrong, I will always enjoy something sparkly, but when the occasion just calls for something small like a pair of earrings or a bracelet, it doesn't make sense to buy me one when I can make it myself.

So what do you give your jewelry designing girlfriend?

Well this Christmas, our first Christmas, my boyfriend figured it out. He wrapped up polymer clay tools, jewelry supplies, pendants and findings so I can make my own jewelry! Not only did he venture into the craft store, but he went into the jewelry aisle where any man would feel out of sorts and clueless. This could not have suited me any better. He earned points for several reasons...going to Michaels, understanding that it really is the simple things that make me happy while also thinking outside the box and not going the typical route most guys do when it comes to gifts. He also scored some style points by selecting items I am actually able to work with.

He tells me I am supposed to make jewelry out of these gifts to sell. How am I supposed to take something so thoughtful and meaningful and give it to someone else? I won't be doing this. At least not this year. This year I am making jewelry for myself to wear. Wear proudly because I have such a thoughtful man in my life.

So what am I going to make?

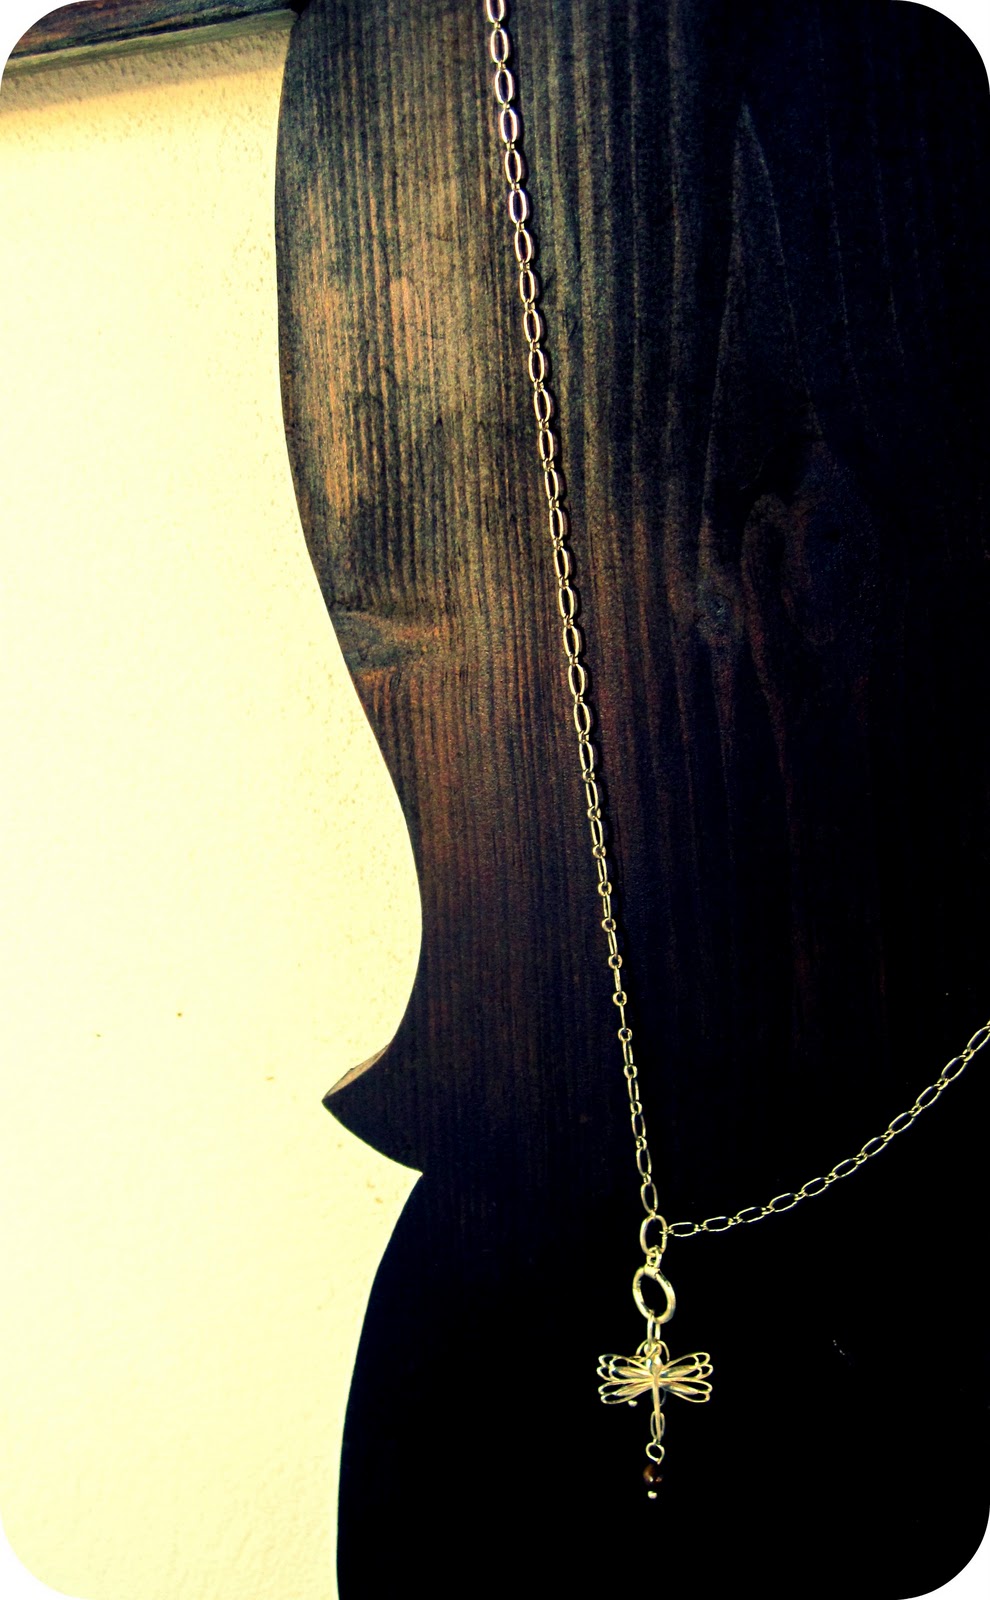
The first thing I made out of my awesome Christmas gifts was a necklace using the dragonfly pendant Jeff gave me. I have been wanting to take a break from my orders to make a new necklace for myself, and this gave me the perfect excuse. It has been a long time since I had a sentimental piece of jewelry. One of the downfalls of making your own is that I can't say oh this necklace was given to me by...when I...to celebrate...Of course my jewelry is special to me because I made it, but I am a sentimental sap and I always like a hidden meaning in things. The plan was to use this pendant in an "everyday" necklace that I can wear frequently. so I chose to accent the dragonfly with brown beads to keep it neutral. I chose the the converter design so I can wear it with many different outfits.

Why am I calling this a converter necklace?

Because it is 2 necklaces in one! I use the loop of a toggle class as a decorative and functional piece. I just double up the chain and slide the bar through the loop when I want to wear it as a short necklace. I will be using this design often so I can offer my customers a piece that they can get the most use out of. I am looking forward to discovering the possibilities.


Monday, January 10, 2011

Happy 2011!! A new year of fresh ideas and possibilities!

Happy New Year!! I took a bit of a break from posting over the holidays to work on some personal projects and allow more time to keep up with some holiday orders. I have also been experimenting and learning a few new techniques that I am excited to share with you very soon.

I also had my first house party in December and it went very well! I enjoy small gatherings like this because it allows more time to talk with the ladies about what they like and want to see in the future. I pay attention to the colors everyone is gravitating towards, what looks best with certain skin types and hair colors as they try on my jewelry, and of course I listen to all of their comments. From this first party I was able to book another one for later this month! This is a great way to keep the momentum growing during the winter months while I am waiting for the busy festival season to begin again in the spring. My goal is to have at least one party scheduled each month.  

Let me know if you would like to host a jewelry party in your home. All hostess' receive their pick of the jewelry depending on the turnout. 

I am very excited about what is to come in 2011, both personally and professionally. 2010 was a very exciting year, especially after I launched my business on facebook last winter. I cannot believe it has been less than a year since I began sharing my jewelry with everyone. I never imagined that my little hobby of making earrings would have turned into and all of the great people I have met along the way because of it. I am so very grateful for everyone's support and I am looking forward to what is yet to come!

Happy 2011! Let's all have a great year!

Tuesday, December 28, 2010

A Handmade Christmas

Someone please remind me next year to start thinking about my Christmas gifts EARLY!
Waiting until the last minute to do your shopping is one thing, waiting until the last minute to decide you are going to make something for someone is a totally different kind of procrastinating. I often make many of my own gifts. Don't get the wrong idea...I am not crocheting oven mitts for everyone, but I do make several gifts each year. Occasionally one big project will take over my holiday season. The past 3 years have all been gifts for my Sister and her Husband.

Christmas 2008 - The wedding album.
In this album, I chronicled the year my Sister was married. I had pictures from the time they became engaged all the way up to the wedding reception and every dress fitting in between. Needless to say I love taking pictures. The album ended up being somewhere near 500 pictures. Ridiculous. I know. I am a shutterbug.

This is not however, a scrapbook. I have never been much of a "scrapbooker", but I don't mind making a few pages here and there. Mostly, I prefer to let the pictures speak for themselves. I make title pages and then insert plastic photo sleeves behind each occasion.

Christmas 2009 - The calendar. 
On October 10th, 2009 my beautiful niece was born. To help my sister document her daughter's first year, I made a calendar for her to write things down on easily throughout the days. Yes, you can always buy a baby book and my sister kept one, but homemade gifts are always a welcomed treasure.
I look forward to projects like this. It is always better to be creative when your whole heart is into it. So if someone wants to do the work for you...let them.

Christmas 2010 - Album for Elizabeth.
As I am sure you suspected, I took many, many pictures throughout Elizabeth's first year. So for Christmas I took the Calendar back that I made in 2009 and placed the pages in an album along with all of the pictures. Each calendar page became the heading for that months pictures. Luckily my sister did a great job of filling in the days. Made it very easy for me to match up the pictures with the correct month.

The wedding album was more of an undertaking because I sat down and made all of these cover pages in only a few days at the end of the year. For Elizabeth's book, all I had to do was match up the month with the calendar page and organize the album. This is why I made the calendar on 12x12 scrapbook paper so I could insert them easily into the album a year later.

If you ever feel inspired/crazy enough to take this project on for yourself or someone you love, here are a few things I will remember to do the next time...
  • Plan ahead! I was snapping pictures all year long, however, I should have been printing and organizing the pictures all along instead of a few days before Christmas. Not to mention the cost could have been spread out throughout the year. 
  • If you plan to do this for several important years like I did, buy more than one album when you purchase the first one. You want a book like this to be set out and enjoyed. It should work with the decor of the home, so I like the idea of matching or complimentary albums. A baby book doesn't have to be pink bunnies and bows. Choose a cover that works with the decor of the home or neutral enough to blend.
  • During a year of firsts, take your camera wherever you go! The greatest thing about digital cameras is that you can capture and delete later. I didn't miss anything with Elizabeth. My sister wrote on the calendar the day she had her first bottle in a restaurant...guess who took a picture of it! OK so that may sound a little overbearing, but I always have my camera with me, so if I see a moment worth capturing I will take one quick picture. 
  • Include everyone. My brother-in-law's family lives far away, so I was sure to take pictures whenever they came to visit.
  • Collect pictures from everyone. Especially if the album is not for you. I wasn't able to be there for all of Elizabeth's milestones, but my Sister and Brother-in-law certainly were. Her first Christmas, the first time a tooth popped out, the first time she went to the pumpkin patch...we captured everything!
  • Make sure you do the same for the siblings. We've all heard that the first baby has the filled and documented baby album. By the time the 3rd comes along...you're lucky to even have pictures. I know what all mother's will say...once you have more than one, you just don't have the time. I get it. Just pace yourself. Print pictures once a month and take a nap time or an early morning alone to throw them into an album. Or just hope that you have an awesome Aunt Ryann to do the work for you.
What a great thing for Elizabeth to look through when she is older. Wouldn't you want to know the first time you ate string beans?

Friday, November 26, 2010

Happy Thanksgiving!

Thanksgiving has always been one of my favorite holidays because it isn't about what you are going to buy and how many gifts you are going to get. It is simply about spending time with your family while eating a good meal.

I have mentioned before how large my family is, so to host the entire clan is quite an undertaking. Sometimes the count may even reach around 30, but on average about 20-25. This year was a little different because my Aunt Maureen, Uncle Alan and their 3 boys moved to Utah this summer. For the past several years Maureen has always hosted Thanksgiving dinner. Every year I went to Maureen's the day before to help her set the table. You wouldn't typically think that setting a table would take all afternoon, but when you are trying to fit 20 some people all around one table, it takes some time. Thanksgiving Eve was always a special time for me because it allowed me an opportunity to spend the afternoon with my Aunt Maureen who is also very much my friend. Maureen would be working in the kitchen putting together what she could a day ahead and I would be clipping flowers assembling the centerpiece while catching her up on whatever drama was currently going on in my life. An afternoon I will be missing terribly this year.

Thanksgiving was special at Maureen's for several reasons. She always made sure that we were able to fit everyone around the table. This usually meant putting together many different sized tables stretching out into the hallway, BUT we all sat together.

One of the many tips I have picked up from Maureen- Keep notes from year to year. Maureen had notes  scribbled next to her recipes about what worked and what didn't. She also drew little diagrams of the table configurations we came up with so that we could refer back to them in the years to come depending on the amount of people. Trust me, we came up with some creative table shapes.

Maureen's hosting skills have always impressed me. She never went too fancy or crazy with the food. For Thanksgiving I believe you should stick with the basics, but do them well. There is no need for fancy stuffing with crazy ingredients. Save that for a regular night when you are just having pork chops for dinner, Thanksgiving already has so much going on. Maureen also kept up with many small and perhaps unnoticed touches every year, like the pickle plate. We always had a pickle plate on the table. Things you may not notice year after year, but definitely do miss when they are gone.She always went above and beyond but somehow made it seem effortless. The reason is because she really does enjoy putting everything together, and you can tell by the way her food tastes and the atmosphere of the evening. The worst is when you go into someone's home and they are freaking out, running around, and look as if they might stab anyone who dares enter the kitchen. Don't offer to host if you are going to act like it is the biggest inconvenience, it makes everyone uncomfortable. If you do not have a choice...plan better, ask for help and keep reminding yourself that it DOES NOT have to be perfect. When all else fails grab yourself a glass of wine.

In Maureen's absence my Aunt Diane and Uncle Michael hosted this year. The dinner was delicous and the company was lovely, but it just wasn't the same and probably won't be for some time now. I might just have to go to Utah next year for Thanksgiving.